As the matter of computer system software, when rooting, different computer may have different circumstances. After receiving iPhone and rooting it, I find that when the progress bar goes about one tenth, as shown in the following picture, it reports error (40).

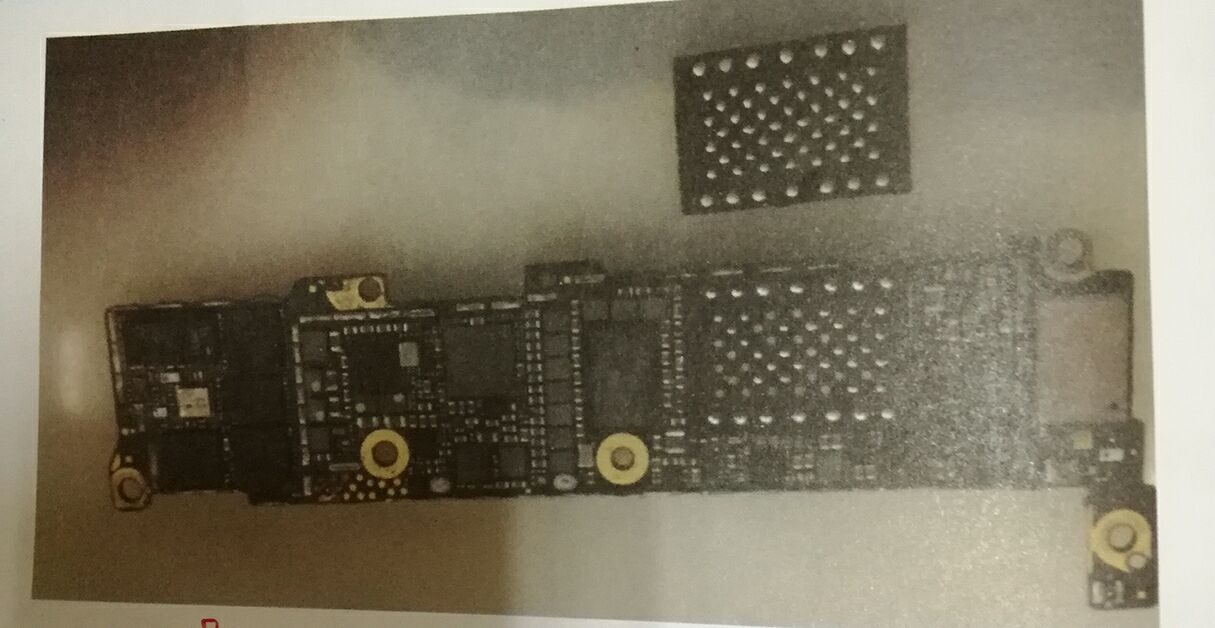
Judging from my repair experience, when the progress bar goes about one tenth, it reports error (40), which may be related to NAND FLASH. Next, remove motherboard and pry up NAND FLASH, as shown in the picture.

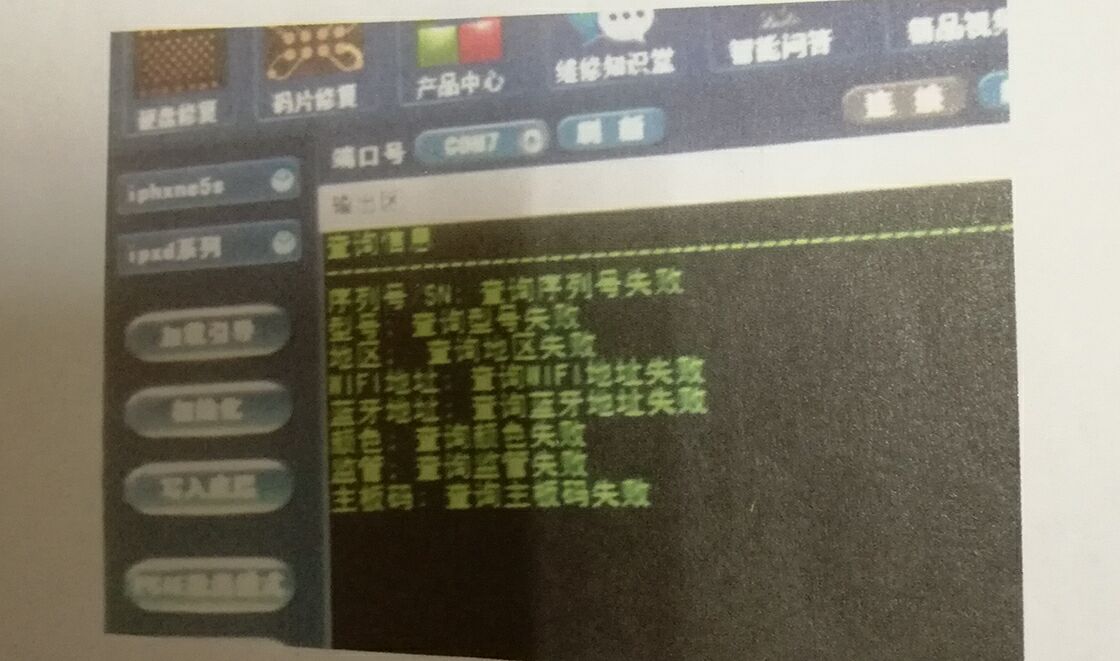
Use JC NAND FLASH Test Fixture to test NAND FLASH, finding no series number in NAND FLASH, as shown in the following picture. Thus I know that the NAND FLASH is damaged.

I am goint to replace NAND FLASH. As the series number is stored inside NAND FLASH, at the same time, I have to replace the series number too. Because the original NAND FLASH is damaged, I cannot know the series number from original NAND FLASH, so I have to search the series number through original motherboard IMEI. The method of getting motherboard IMEI without touch any chips is as below:
Remove a NAND FLASH from a workable motherboard and assemble it on the faulty motherboard to root. When the activation interface is shown, clicking the icon that resembles exclamation mark, we can see the IMEI. Now I can search the series number through original motherboard IMEI and write series number into the workable NAND FLASH, the operation interface is shown in the picture.

After writing the series number, I root again and the rooting goes smoothly. Trouble is removed.
Hope it will help you, other iPhone repair skills or equipment read at www.vipfixphone.com

Judging from my repair experience, when the progress bar goes about one tenth, it reports error (40), which may be related to NAND FLASH. Next, remove motherboard and pry up NAND FLASH, as shown in the picture.
Use JC NAND FLASH Test Fixture to test NAND FLASH, finding no series number in NAND FLASH, as shown in the following picture. Thus I know that the NAND FLASH is damaged.
I am goint to replace NAND FLASH. As the series number is stored inside NAND FLASH, at the same time, I have to replace the series number too. Because the original NAND FLASH is damaged, I cannot know the series number from original NAND FLASH, so I have to search the series number through original motherboard IMEI. The method of getting motherboard IMEI without touch any chips is as below:
Remove a NAND FLASH from a workable motherboard and assemble it on the faulty motherboard to root. When the activation interface is shown, clicking the icon that resembles exclamation mark, we can see the IMEI. Now I can search the series number through original motherboard IMEI and write series number into the workable NAND FLASH, the operation interface is shown in the picture.

After writing the series number, I root again and the rooting goes smoothly. Trouble is removed.
Hope it will help you, other iPhone repair skills or equipment read at www.vipfixphone.com
评论
发表评论